Showing posts with label pizza. Show all posts

Monday, March 16

Easy 3 Step Eggplant Red Pepper Tomato Pasta Sauce

I have a great, half day simmer, until the house smells awesome, recipe for vegetable pasta sauce. I have used it for years. I usually make two huge stockpots full. Then freeze the sauce in 1 cup, 3 cup, and 1/2 cup increments for pizza, spaghetti, chili, chicken parm, and anything that needs a tomato-like sauce. ahem. Please excuse the Italian biased list - this sauce is good in many different types of food. I heart Italian food.  

Anyways... This sauce is full of veggies that are diced, lightly sauteed, pureed, and simmered until all the flavors marry together. I must admit it is kind of a process. It isn't exactly baby-not-sleeping-through-the-night, exhausted-new-mom, husband-busy-with-college-and-work type of thing though. Even if its freezer friendly and I can make large batches that last for a few months.... I eventually will run out. And I did. Enter an easy three step eggplant, red pepper tomato/pasta sauce. 


Gasp. I hate running out of staples. This left me scrambling until... I remembered this great this sauce using eggplant, so I whipped up something similar. Only took 20 minutes! I could hold the baby a little, let him play on the floor, and before I could say wet diaper it was done! It tasted great and also worked extremely well in my updated chipotle pizza casserole

I heart eggplant. It is so easy to work with, and combine into things without much notice. It's also a great source of b vitamins and fiber. 


The Sauce
makes approx 4 cups

1 tsp olive oil 
1 can (14-15oz) tomato sauce
1 can (14-15oz) fire roasted diced tomatoes
1/4 cup of pinot noir (one of my fav red wines)
1 eggplant, skinned and chopped
1 red pepper, seeded and chopped
1 1/2 tsp dried basil
1 1/2 tsp garlic powder
1 1/2 tsp onion powder
1 tsp salt
1 1/2 tsp smoked paprika
1/4 tsp pepper 

Variations
1. To make this into pasta sauce or pizza sauce add 2 Tbs of Italian seasoning.

2. If you are using this in the place of canned tomato sauce like in chili I would add in 1 tsp more smoked paprika. 

3. Keep it as is, and use it in the place of anything that calls for canned tomato sauce in a recipe to get more nuritients.


Easy 3 Step Directions

1. Combine the olive oil, eggplant, and red pepper in pot or pan with thick sides. Saute for a few minutes. 

2. Add in everything else, stir well, and simmer on medium low for 15-20 minutes. Stir occasionally. 

3. Blend the tomato mixture in a food processor or blender until it is smooth. Taste and adjust seasonings if needed.

*A useful tip: when blending hot things like sauces or purees use a hand towel over your blender to prevent the steam popping the lid off, splattering your kitchen with food, or burning yourself. 

*If freezing cool completely before storing in freezer bags flat or in freezer containers. 

Saturday, February 1

Turkey Sloppy Joe Skillet Pizza

Sloppy joes are definitely a childhood favorite meal. They were meaty, messy, and tasty. They had that great contrasting sweet and salty combo that I still enjoy to this day. So when I came across this recipe from The Hopeless Housewife, I loved the idea of a twist on my old family favorite with a current family favorite... 2 recipes smashed into one creating the Turkey Sloppy Joe Skillet Pizza. 

My own twist limits some of the sugar and increases the veggies....aka my normal idea when I approach almost any recipe. Since this delicious cheesy meaty pizza is something you do with a fork - you won't need tons of napkins to clean up either. I did have to cut up my sons pizza since it was hard for him to get through it. Otherwise I got two thumbs up from everyone. 


Turkey Sloppy Skillet Joe Pizza 
cooking + prep + cooking + baking + cooling time:
 25-30 minutes
serves 3-6 people  
(my 4 yr old at 1 slice plus some veggies on the side)

9 Ingredients:
One half a package or a halved recipe of whole wheat pizza dough. I make several batches of pizza dough at a time and store in the freezer. Whole wheat dough from the store is good too. 

1.25 lb package of lean turkey breast

1 tsp dried onion

1 Tbs brown sugar

1 tsp salt

1 red pepper, finely diced

2 cloves of garlic chopped finely

2 cups of your favorite pasta or pizza sauce (homemade: freezer staple red sauce - click here) or store bought. It has no sugar in it and tons of pureed veggies like squash zucchini and tomatoes. (much better than the typical ketchup & worcestershire sauce combo)

2 cups of shredded cheese - I used 1 1/2 cups of mozzarella and then a 1/2 cup of marbled cheddar & Jack. Going to use a smoked cheese next time just change things up. Pick any good melting cheese. Pepperjack cheese would be a good spicy alternative.

Optional pizza toppings: dried parsley, grated/shredded parmesan cheese, dry red pepper flakes 

Directions:
1. Pull your pizza dough out of the fridge and let it warm up and rest. Grab two skillets - one oven safe one. While that is happening start the pizza topping in a large skillet.

2. To make the sloppy Joe pizza topping brown the ground turkey with the garlic, onion, and red pepper. 5 minutes. Break any large pieces think pizza topping.  

3.  Add in the red pizza/pasta sauce and brown sugar. Mine was frozen straight from the freezer but still worked just fine. It was defrosted quickly and the whole sauce was red, delicious, and thick. 7 minutes. 

4. While the sauce is thickening up, stir it occasionally, and preheat the broiler to 500 degrees. Add some oil if needed to your oven safe skillet. I used used my trusty old cast iron for this. 

5. Roll out your pizza dough to the size of the bottom of your skillet and proceed to cook the dough over medium, watching it carefully so it doesn't burn for about 5-7 minutes and then flipping it for another 2 minutes. I burned my the first one I tried. It reminded me of making flat bread. Should be lightly browned but cooked thru.

6. Top the crust with the meaty topping. It should cover it completely by at least an inch. Top the sloppy joe mixture with all that great shredded cheese. 


7. Broil the pizza for about 1 minute with the oven door cracked so you can keep an eye on it. You know its done when the cheese is melted and looks amazing. You can serve it immediately but I found it to be easier to cut and eat if you wait 5-8 minutes to let it cool a bit. 

8. Slice it with a pizza wheel and grab some forks to dig in. 
Enjoy pizza night in a new way and sloppy joes with a little less sugar and carbs than the original.  


From my kitchen to yours!
Stephanie

Wednesday, October 9

Whole Wheat Three Cheese Kale & Sausage French Bread Pizza


We have been doing pizza pretty regularly since football started 4 1/2 weeks or so ago. I am hanging in my fantasy football league but beginning to HATE my defensive line/special team. Never EVER picking the Giants again. Sigh. okay. food. Pizza. Please ignore that. It was a tough weekend for me.  

If you, like me have never had kale on pizza before you might be pleasantly surprised. Honestly, my husband tolerated it, but my son and I ate it just fine. Actually, I thought it was amazing. But I eat green veggies all the time so warning to those this may be an acquired taste. Heck though if I could get my family to eat one of these pizzas twice a football season I think I would be feeling really good as a mom. 

This is one of the really approachable recipes because it starts with a store item = french bread. With the three melted cheeses, and crumbled sausage bits, and crunchy bread it might become one of your favorite pizzas too.  Dinner done in 20 minutes isn't a bad way to go either. Recipe was adapted from September 2012 Everyday Rachael Ray magazine. I used a different set of cheeses and made it a bit more family friendly. This is recipe number 13 of my challenge to make 30 Rachael Ray recipes. 


Ingredient list:
1 loaf of whole wheat french bread
1 lb of lean pork sausage
1/2 cup of red sauce (or your favorite pizza sauce)
1 oz thinly sliced or grated parm (about 1 handful)
2 oz of smoked Gouda cheese thinly sliced (about 8 thin slices)
1 cup of shredded mozzarella cheese
4 large kale leaves (stems removed)
2 Tbs chopped fresh thyme
salt & pepper (see below for amounts)
1/2-1 tsp oil 

Step 1:  In a large pot bring water and the kale to a boil. You want the water to be barely touching the kale about half way. Add 1/2 tsp salt. Cook it for 2 minutes on medium with a steady simmer of bubbles. 

Step 2: While kale is cooking. Grab a bowl and fill it with ice and water. You are going to immediately transfer the cooked kale to the bowl with a slotted spoon to stop the cooking process. Blot it with some paper towels or wring it out in paper towels to remove excess water. Set it aside.


Step 3: Preheat your oven to 400. 

Step 4: Cook your sausage with 1/2-1 tsp of oil and 1/2 tsp salt and 1/4 tsp pepper. Should take about 5-6 minutes using a spoon or spatula to crumble it into small pieces. Have a paper towel lined plate to transfer it to, to cool slightly before adding it to the top of the pizza. 


Step 5:  Cut your loaf of bread open and place on a baking sheet. Start layering your ingredients on both sides. Spread the pizza sauce. Sprinkle the grated or sliced parm. Layer the sliced Gouda next approx 4 pieces per loaf. Layer the kale next slightly pulling it apart into pieces for easier eating. When the sausage is done, add that to the top of the kale. The mozzarella cheese & thyme is last but not least. The fresh thyme really is a fall smell for me and brings everything together. 

Step 6. Bake for about 10 minutes until it is golden, bubbly, and delicious looking.  Let it cool slightly before serving. 


Enjoy football and fall :) 
Happy pizza/veggie eating 
from my kitchen to yours

Saturday, April 20

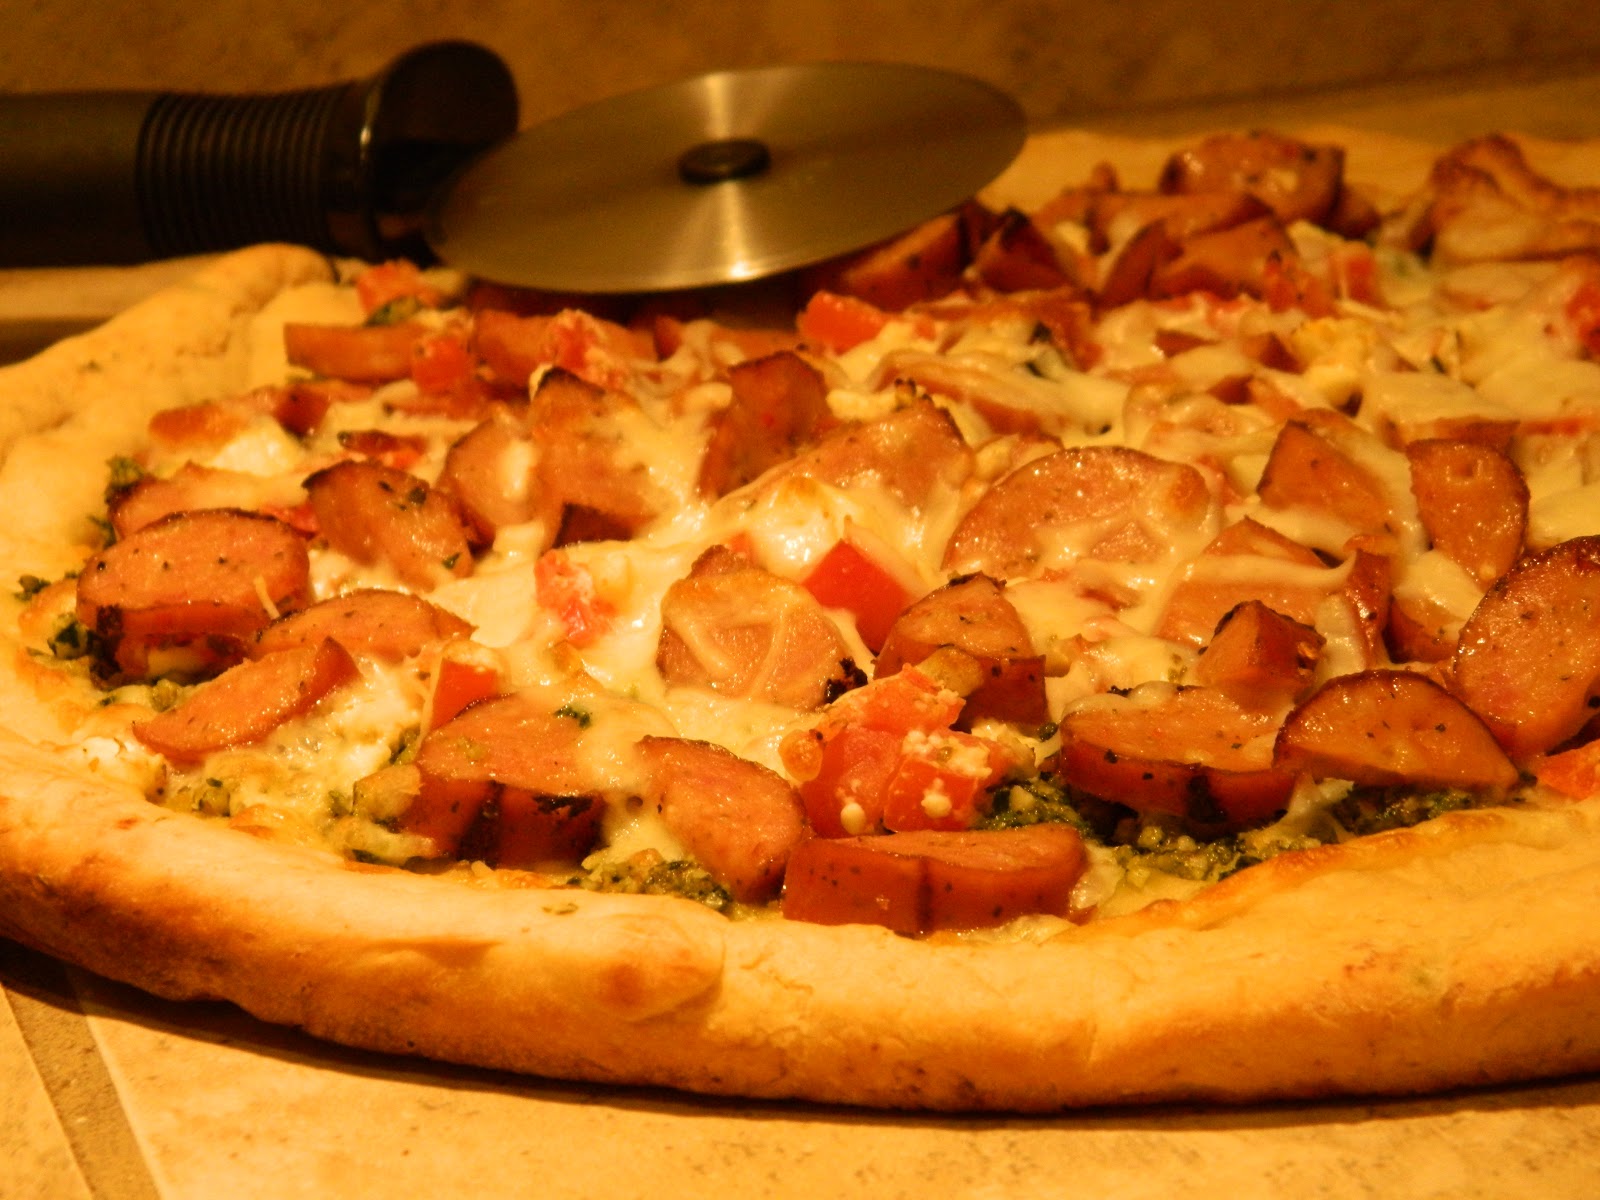
Chicken Sausage Mediterranean Pesto Pizza: Perfect Summer Pizza

The Perfect Summer Pizza


This recipe caught me off guard from the moment I saw it years ago in a magazine until even now after eating it for dinner. First, I not really a fan of Mediterranean foods. I dislike olives. I haven't ever cooked with capers but I do admire the healthiness of those kinds of dishes with good fats like fish, and olive oil, ect. If you are a fan - you will love this dish. If not... be fun and creative and step out on this limb with me. Trying new foods is fun. Second, it was a recipe in advertisement. They were trying to sell their brand of chicken sausage LOL the picture sold me. This was NOT a normal place to find a good recipe. Haha. I have issues with recipes that don't have pictures but that's a whole different conversation - back to the pizza. Cheesy. Meaty. Flavorful. Yes pizza. Of course when I finally get around to making the recipe THAT particular brand of sausage was no longer available so I had to find something else, similar. I think I accomplished that. Italian... Mediterranean... Same part of the world :)  

So kudos to the al fresco sausage company for their marketing was the inspiration of this meal :) I changed up a bunch of things and didn't use their sausage, but figure credit needs to be given where ever credit is due. Perhaps I just wanted a recipe to use pesto again. Have you ever made pizza with feta cheese? I am curious now.... hahaha :) I would love to hear what others have come up with. 

This would be a great summer light dinner - not too heavy like our old household standby, Pepperoni. This would be fun to entertain with, have for lunch if you have 30 minutes to make it, or just a great dinner with the family. Try. Eat. Have fun. Summer is coming. You could even change it up and grill it so you don't have to heat up your kitchen. Try. Yes I am repeating myself. Its been that kind of a morning or maybe it was that third cup of coffee. I will get back to you about that. 


Ingredients:

  • Store Bought Pizza dough OR homemade. To make your own gather the following ingredients: 
 2 cups all purpose flour, 1/2 cup white whole wheat flour, 1/2 tsp of Italian seasoning, 1 Tbs white sugar, 2 Tbs olive oil, 1 cup warm water, 1 Tbs yeast - all mixed together with your hands. Add a bit more flour if needed but it should come together easily. Kneed it until its uniform 2-3 minutes and let it sit in a bowl under a towel for 10-15 minutes. 

  • Store bought pesto OR homemade. To make your own gather these additional ingredients: 
2 handfuls of fresh parsley (1/2-3/4 cup), 1 handful of basil (1/4-1/2 cup), 1/4 cup of walnuts, 1/4 tsp salt, 1/8 tsp pepper, 1/4 cup of shredded cheese (I used parm/asiago/romano trio-  use any good quality grated or shredded cheese), and olive oil to drizzle into the sauce


  • 1 Roma tomato, seeds removed, finely diced
  • 1/2 cup reduced fat feta cheese crumbles
  • 1 tsp of dried oregano 
  • 1 1/2 cups mozzarella cheese, shredded
  • 3 Chicken Sausages -  9oz total (mine was already cooked 3 cheese Italian style with red bell peppers and garlic - my goal here was just to try out a new chicken sausage - having the sausage precooked did save me some time)
  • 3 or 4 good appetites

Directions:

1. Make your pizza dough or pull it already made from the fridge to let it come to room temp. 

2. Preheat your oven to 400 degrees. Use a stick of butter or non stick cooking spray on your pizza pan. 

3. Flour your work area and start to pull and stretch your dough. Set the dough in the pan - push and stretch it to make it fit but not be too thin in any area. 

4. While oven is preheating.... reheat or cook your sausages, if they aren't already cooked

5. Dice your tomato and set it aside with the feta cheese crumbles and dried oregano.

6. Use a food processor to make the walnut herb pesto sauce -  In a food processor or a maybe a blender would probably work in this - I just haven't tried pesto in a blender before.... add the fresh basil, parsley, walnuts, salt, pepper and slowly drizzle in the olive oil. I never know how much olive oil I need. Just drizzle some in slowly and keep an eye on the texture. You want it pretty smooth  since its going to be the pizzas sauce. 

7. Put the plain pizza dough in the oven for 5 minutes to start the baking process.  Once the 5 minutes is up. Pull it out and crank the oven hotter to 450. 

8. While its heating up, spread all of the pesto on top. Then a small layer of feta cheese/tomato mixture. Then half of the sausages sliced thin*, and half of the mozzarella cheese. Repeat. Feta cheese/tomato mix, sausages, mozzarella cheese. My son loved helping with his part. Just be careful the pizza pan will be hot. Done. 

9. Throw it back into the oven for 10 minutes or until it looks golden and the cheeses are completely melted and gorgeous. 

 *Note: I have a small kiddo so I sliced and then halved mine a bit smaller so he wouldn't be able to choke if he crammed a bunch in his mouth. If serving to adults a thin circle shape would be much more pleasing to the eye. 


There. Easy summer healthy food and pizza. Never thought I would be calling pizza healthy but I think this one really is. If you make the pesto and the dough like I did you can have the satisfaction of loosing some preservatives too :)  

Enjoy - Summer is coming. 
From my kitchen to yours. 


Friday, February 15

Pepperoni Pizza

Red Pepper Pesto Pepperoni Pizza (trust me) 


Pizza. Every kid's favorite food, right? Okay and well a lot of adults. During the fall we regularly have pizza every Monday night football. This version gives the ol' pepperoni stand by a push into adult sophistication and ups the nutrition up a bit. The name is Red Pepper Pesto Pepperoni Pizza to be exact. It even sounds a bit more refined. Wow what a difference a bit of pesto makes in the place of tomato red sauce on a pizza. I have been on a pesto kick for a few weeks now. It started with the cilantro walnut pesto I made for fish tacos, and then parsley walnut pesto I made for pork chops (both of those can be easily be found under the dinner tab). So naturally I saw this recipe in a Rachael Ray magazine and got super excited. Try it now or make it when summer hits... amazing flavor 

I needed some comfort food to start the busy weekend. Its been one of those days.... okay I will level with ya. Any day in which you have a doctors appointment that you have to strip off clothing for the doctor  - I personally think pizza should always be in order! I am making a new household rule :) 

So I picked up a loaf of french bread from the bakery and whipped this up in under 30 minutes. Super flavorful. Super yummy!!! My son hasn't even noted that he's eating 2 different veggies. The first thing you taste when you crunch into this delight is the freshness of the basil, red pepper, and tomato. Then you taste the creamy melted cheese. The pepperoni isn't a star of this pizza pie although it certainly can be if you add more than I did. So if the pepperoni is a supporting cast member, the red pepper shines brightly as the star of the show. As a veg with tons of vitamins I am happy to let it shine in the company of cheese and bread and pepperoni, probably a mom thing. Red bell pepper has fiber, vitamin a, vitamin b-6, manganese, niacin, potassium, riboflavin, thiamine, and vitamin c. Some of those change when cooked, but if you roast it you aren't using any water and it doesn't change the vitamin c level which makes me happy when colds are still hitting people so hard this winter/early spring. To read more about nutrition, please click here. The original Rachael Ray recipe, from the 2010 magazine, that this was adapted from can be seen, by clicking here


Serves 4 


To make this amazing pizza gather these ingredients: 

1. Loaf of french bread, split horizontally 
2. 2 red bell peppers
3. 1 Tb olive oil + more for drizzling
4. 1 tsp salt
5. 1/4 tsp pepper
6. 1/3 cup of shredded mozzarella cheese
7. 1/3 cup fresh basil chopped
8. 1/2 Tbs lemon juice
9. 1 & 1/2 - 2 cups of shredded cheese for topping the pizza 
 (use the cheese of your choice. I used one labeled pizza) 
10. half a package of pepperoni (about 1 1/2 oz) 
11. One roma tomato, chopped into chunks


Directions 
1. Preheat your bbq or grill. 

2. Remove the core and seeds from the red peppers, and quarter them. Put them in a bowl with the olive oil and toss until they are all coated. 

3. Roast the peppers for 5 minutes on each side until they are charred

4. In a food processor put the 1/3 cup shredded cheese, basil, chopped tomato, salt, lemon juice, and pepper. 

5. Let the peppers cool and then remove some of the charred black skin. I left about half because I like the smell and taste of "bbq" foods. Put the red peppers in the food processor and let it pulse for about 10 seconds. 

6.  Start drizzling in some olive oil until it comes together like a liquidity paste. Taste it to make sure the salt & pepper is right. 

7. Preheat oven to 350. 

8. Cut the french bread. Pull out some of the middle sections and save them for breadcrumbs later. I threw about a cups worth of the inside fluffy bread into a zip lock bag and threw it in the freezer. But removing some of the bread you can really load the yummy pesto and cheese on. Save the bread calories so you can spend them on some real flavor. 


9. Spread the pesto over the bread (this amount will fully cover plus so pile it on or use some for something else). I am thinking this pesto would taste amazing over chicken. Layer on the cheese and pepperoni and bake. 


10. I used a oven and cookie sheet at 350 for approx 8 minutes until everything looked melted and hot. But you could do this on a grill quite easily or a pizza stone. Make it your own ;) 


This is the ultimate comfort pizza meal. 
Perfect for the upcoming 3 day weekend. 
From my kitchen to yours... happy Friday!


Thursday, January 31

1 Chicken Dish Three Ways (freezer friendly)

So today is Jan 31st.  Happily February (my birthday month) starts tomorrow, and the cooking magazine my hubby surprised me with has tons of cake recipes wahoo! Yes I make my own cake but it totally pays off. I totally don't mind especially if we go out someplace fun for dinner. Store bought cake is welll okay not really personal or fun... and my kiddo can't lick the frosting off the mixer's beaters if the store makes it. My hubby always asks for a choc cake because that's his "thing" but I like to mix it up. One of my fav birthday cakes of all time, was made maybe 10 years ago, a banana nut cake that my brother made while we were camping in a rv trailer with a dinky little stove and oven. hahaha! But really the focus of blogging today isn't cake, I am just really deep on a rabbit trail this morning. 


I really want to tell you about this three meals I made last week. It all started with a single freezer meal. Some chicken and ingredients for a marinade that I bought, prepped, and threw in the freezer for later. Easy!  


Meal #1: Grilled Chili Maple Chicken and veg
(serves 4 )
this recipe is directly taken from http://whenthedinnerbellrings.blogspot.com/2011/06/super-easy-way-to-getting-meals-ready.html
I didn't change or adapt the recipe. I doubled it. 

What you need for this recipe: 
3 lbs boneless skinless chicken breasts or tenders
4 Tb water
2 tsp salt
3 Tbs maple syrup (the good kind not the imitation)
2 Tbs chili powder 

Directions:  
1. Trim the chicken and cut into long strips approx 4 or 5 per breast, you can skip this step by buying tenders but usually that's a bit more expensive. (need approx 
2. Label your freezer bag with the title of the dish, date, and cooking instructions
3. Mix all the other ingredients together in a bowl. 
4. Put the cut chicken into a gallon freezer bag and pour the marinade over the top. 
5. Lay the bag flat in the freezer 

When you want to use it: 
1. Defrost it in the fridge the night before
2. Grill it up the next day approx 4 minutes on each side until done.
3.  Serve 3 strips per person with your favorite veg, rolls or rice to round out the dinner.


Meal #2: Chili Maple Chicken Quesadillas
Leftover meat is awesome for stews, casseroles and one of my favorite things CHEESY quesadillas!!! 
To round out this meal serve it with rice. You will have dinner done in less than 30 minutes!
Makes 4 


What you need for this recipe:

  • 1 1/2 strips of leftover chicken per quesadilla = 6 total depending on appetites (1 strip for kids)
  • 8 tortillas - 2 per quesadilla
  • 2 cups of cheese whatever you have around, i used shredded mozzarella
  • 1/4 red pepper, finely diced, divided into all 4 
  • 1 Roma tomato, finely diced, divided into 4
  • 1 jalapeno (optional if you like things spicy) 
  • 4 Tbs cilantro, divided 
  • 1/2 cup salsa, divided (1/8 cup each)
  • optional toppings: Greek yogurt or sour cream, chopped lettuce, salsa, sprouts, ect

Directions:
1. Lay out 4 tortillas. Put 1/4 cup of cheese on each one. 
2. Dice up the chicken strips and put equal amounts on each one. 
3. Put equal amounts of red pepper, tomato, cilantro and jalapeno one each one. 
4. Top with the remaining cheese, salsa, and the last tortilla 
5. Cook them in a quesdilla maker or on the stove. A long grill flat grill pan over two burners would do it all at once. I used a quesdailla maker to help me out. 
6. Cut the cheesy mouth watering rounds into 4 or 8 pieces on large plates with toppings piled in the middle


Meal #3: Maple Chili Chicken Supreme Pizza

The sweet nature of this chicken pairs so beautifully with red onions and chopped pineapple. I wanted to eat the whole pizza!  Since my family isn't quite into chicken pizza. They are missing out! So as you can see in this picture, I did half supreme and half pepperoni. So I am going to just double the amounts I used so you know how much you'll need for a whole pizza. 

                               What you need for this meal: 

1. Leftover Chili maple Chicken strips - 4 or 5, finely diced
2. 1 small can of pineapple  1 - 1 & 1/2 cups of finely diced 
3. 1/2 cup red onion, finely chopped
4. 1 1/4 cup of mozzarella cheese 
5. 1/2 cup pizza sauce
(click here for an easy recipe). 
6. Pizza dough 
(click here for an easy 10 minute rise dough)
7. handful of finely chopped cilantro 


Directions
1. Make the dough if not using store bought
2. Defrost the pizza sauce in hot water if you have some made or open it from a can 

3. Par bake the pizza rolled out on a pizza stone or pan for 3 minutes at 500 degrees

4. Turn the oven down to 450 while you top the pizza crust
5. Top the pizza with pizza sauce, 1/4 cup cheese, then chicken, onion, pineapple, cilantro, and the rest of the cheese
6. Bake the pizza at 450 for 8-10 minutes or until its golden brown


There you have 3 meals all from 1 Freezer Meal of chicken.... Easy Peasy. All three meals took less than 30 minutes to make with only a handful of ingredients. 
I really hope you enjoy these short cuts... I know I will do this again in the future with spring sports starting. 

Enjoy!
From my busy kitchen to yours! 


Wednesday, January 23

Red Pasta Sauce (Make-ahead & Freezer friendly)


Wow.... what a busy week. When I have a busy week I usually reach for meals that are usually half already made in the freezer. Freezer meals and the crock pot have gotten me through many long weeks over the years. This morning I made some pumpkin french toast using some pumpkin puree I had saved last in the fall. Freezer meals rescued me again. 


This vividly red sauce is also a freezer helper. I also love it because...


1. Its easy and requires minimal tending. Cooking with a toddler ( i.e.... growing boy who is constantly saying mom I am hungry, in & out of the kitchen on hands and feet driving trucks all over the floors) is hard. I really try not to cook many recipes that need me to stand at the stove for half an hr stirring constantly. That's usually a recipe for disaster someplace else in the house. A quiet house is trouble.

2. Its full of veggies but doesn't seem to be full veggies. (Tomatoes can hide many things). If your family doesn't like certain veggies but you want those nutrients in them anyways - use this recipe. 

3. Its extremely versatile. I have used this recipe in at least four different ways at different times. You'll love this thing! Its like a transformer. You can even base the ingredients of the sauce on the season, and or whats on sale.  


Different ways to use this recipe: 
1. Sloppy Joes
2. Spaghetti
3.Pizza sauce
4. Stuffed Peppers
5. Chili
6. Chicken Parm
7. Meatball Subs


So grab your favorite bottle of red wine... For this recipe I usually pick a Cabernet something a bit earthy and mild. I grew up in Washington State so I am slightly partial to a winery up there. But pick your favorite and the more local the better so you can support your own local economy, and well you'll probably get a better price than some fancy out of the country thing. Yes a whole bottle. We are going to have some fun! 

The prep takes a little while you don't have a food processor but its so worth it. If you don't have a food processor the hands on cooking time will be approx 15 minutes for the whole recipe. You will need a blender at the end though or an immersion blender to smooth the sauce. I usually double or triple this recipe and make it a couple times a year. It freezes beautifully! 


Ingredients:
1 zucchini
1 small yellow squash
1 yellow or red pepper
4 stalks of celery
4 large carrots, peeled, 
1 32 oz can of crushed tomatoes, undrained
1 14.5 oz fire roasted tomatoes, undrained
1/2 cup of extra virgin olive oil
1 small yellow onion
2 Tablespoons minced garlic
2 tsp kosher salt (course grind)
1/2 tsp pepper
2 tsp dried basil
1 tsp dried oregano
4 dried bay leaves
1 1/2 tsp ground red pepper * 
1 tsp smokey sweet paprika blend or substitute with smoky sweet paprika
1 1/2 cup of red wine (approx half a bottle)
1/2 cup of water
gallon sized freezer bags**
quart sized freezer bags

*if you don't like spicy things halve the red pepper seasoning

**gallon sized are for bigger quanties of sauce like for using pasta and for keeping small quanties of smooth sauce in so they don't get lost in the freezer. The double bagging also ensures no leaking and better freezer protection. 

Directions: 

1. In a heavy pot heat the olive oil over medium. Start chopping all your veggies or using a food processor if they aren't already done. They don't have to be perfectly uniform just small enough it will cook and saute well. You'll blend it smooth later anyways. 

2. When the oil is hot, add the garlic to the pot & stir - let it sauté for just a minute. Don't burn = smells awful. Turn down the heat if you need to. 

3. Saute the veggies in the garlic olive oil.

5. Once onion is translucent (clear) add in everything else (wine, canned tomatoes, seasonings)

6. Simmer uncovered on low for 2-3 hrs - once its thick you can start cooling it down but I like to let the flavors hang out on the stove and develop for an extra hr & to let the wine cook out better)

7. Once sauce is cool, and you have tasted it and adjusted seasonings (usually just salt and pepper). Grab your food freezer storage bags and your blender/hand held immersion blender. I usually blend 3/4s of the batch a little at a time. 

Then decide how you how to want to save it and if you want a thicker sauce (chunky) or smooth. If you have Italian type foods regularly you probably can use it up in 1-2 months but having it in the right portions helps. I usually do a combo of small portions (1/2 cup for pizza nights) and large portions (1 1/2 cups) for subs and small toppings and then large (3 cup portions) for spaghetti, lasagna, & chili. 


Thicker sauce (less smoothly pureed) is perfect for spaghetti, chicken parmesan, meatball subs, & chili - anything that its okay if you see some of the chunks. I save portions of it in 1 & 1/2 cup servings & 3 cup servings first before pureeing everything else into velvety smooth consistency. 

The smooth sauce is an excellent sub for any recipe that requires can of tomato or pizza sauce. Most of the time a recipe calls for a can of tomato sauce I will just grab one of these bags from my freezer and throw it in the fridge so its ready to go. Sometimes I don't even defrost it first. I have found 1/2 cup of smooth sauce is perfect for one large pizza. 

There you have it... 
my veggie filled red magic sauce
from my Az kitchen to yours