Showing posts with label turkey. Show all posts

Wednesday, March 5

Delicious & Healthy Turkey Avocado Burgers


Hi there. Happy Wednesday to you. I am back! I have missed writing here and sharing fun things to eat. My almost-month long absence on my blog was caused by huge things happening around my house... surgery, and a few other fun things. 


First weekends full of truck shopping....  long weekends of truck shopping. But trust me after YEARS of my sweet hard working husband driving an almost broken-down, used, and loved on van for almost 10 years, he really deserved a cool HUGE looking truck. Silver, F150 king cab with a short bed. Yeah bragging just a little. Ten years is a long time of small trying repairs trying to keep that van. just. barely. going. 


Then redoing the front yard.... tearing out the grass/weeds and putting in a pretty dessert front with golden, redish orange, sunset colored rocks. 


Feeling better after my surgery... thanks for asking. Still on lots of meds but doing well. I am enjoying the nice Arizona spring time! Be jealous of me so I can be jealous of you later when you have nice cooler summer temps and can actually go outside in July; instead of hiding in the a.c. conditioned house, play areas, public libraries, and anyplace you can take kids without disturbing others too much. 

So in honor me feeling better enough to try some new things... Heres a twist on the chicken avocado burger I made a month or so ago. It is moist and flavorful lean ground turkey avocado burgers. Perfect quick solution for school nights and also something to surprise friends with on your bbq once it warms up in your area. No one will guess how healthy it is, or that its turkey - ground turkey usually being dry, overcooked, and boring.  Enjoy!  


Also posted and linked to some other great recipes with other bloggers at Whats Cooking Wednesday.


serves 3-4 
prep + cooking time: approx 20 minutes 

Ingredients:
1 Tb olive oil
1/2 avocado, sliced into 8-9 chunks 
1/2 tsp salt and 1/4 tsp black pepper
1/4 cup finely chopped onion
1/4 cup finely chopped baby spinach, arugula blend
1 lb. lean ground turkey (93% lean, 7% fat)
Toppings: buns, cheese, lettuce, tomato, mayo, more avocado if you are an avocado lover like me, mustard, ketchup, ect...  

I used mayo, thick slices of cheddar, some more spinach instead of lettuce and a few more slices of avocado as seen in the picture. My boys did more standard ketchup, cheddar, and a few slices of pickles. Trust me my husband who isn't fond of avocado ate it, didn't notice the avocados, and thought it was great. Enjoy those healthy fats and let it really flavor up your burgers! 


Directions: 
1.Combine everything in a large bowl. Don't smash the avocado into the meat. Keep the chunks for pretty presentation and fun contrasting textures.
2.Separate the meat into four even sized patties (aiming for 1/4 lb each burger)
3.Sprinkle the tops of each patty with salt and pepper. 
If cooking on the stove, use a 1/2- 1 Tbs of olive oil in the skillet to help the lean turkey start. 
If grilling brush the oil directly on the burger so it doesn't stick. 
4.Salt and pepper the tops of each patty. 
5.Heat your cooking medium. You want that nice sizzle and crust that comes from having good heat from the beginning. 
6.Put the salt and pepper sides face down on your grill or skillet
7.Cook until done. Approx 6-10 minutes on each side depending on your heat level. Just keep an eye on it. 
8. Serve with your favorite burger toppings and sides such as green salad, coleslaw, potato salad, chips, fresh cut veggies and ranch, ect. 

Enjoy Spring
From my kitchen to yours!

Saturday, February 1

Turkey Sloppy Joe Skillet Pizza

Sloppy joes are definitely a childhood favorite meal. They were meaty, messy, and tasty. They had that great contrasting sweet and salty combo that I still enjoy to this day. So when I came across this recipe from The Hopeless Housewife, I loved the idea of a twist on my old family favorite with a current family favorite... 2 recipes smashed into one creating the Turkey Sloppy Joe Skillet Pizza. 

My own twist limits some of the sugar and increases the veggies....aka my normal idea when I approach almost any recipe. Since this delicious cheesy meaty pizza is something you do with a fork - you won't need tons of napkins to clean up either. I did have to cut up my sons pizza since it was hard for him to get through it. Otherwise I got two thumbs up from everyone. 


Turkey Sloppy Skillet Joe Pizza 
cooking + prep + cooking + baking + cooling time:
 25-30 minutes
serves 3-6 people  
(my 4 yr old at 1 slice plus some veggies on the side)

9 Ingredients:
One half a package or a halved recipe of whole wheat pizza dough. I make several batches of pizza dough at a time and store in the freezer. Whole wheat dough from the store is good too. 

1.25 lb package of lean turkey breast

1 tsp dried onion

1 Tbs brown sugar

1 tsp salt

1 red pepper, finely diced

2 cloves of garlic chopped finely

2 cups of your favorite pasta or pizza sauce (homemade: freezer staple red sauce - click here) or store bought. It has no sugar in it and tons of pureed veggies like squash zucchini and tomatoes. (much better than the typical ketchup & worcestershire sauce combo)

2 cups of shredded cheese - I used 1 1/2 cups of mozzarella and then a 1/2 cup of marbled cheddar & Jack. Going to use a smoked cheese next time just change things up. Pick any good melting cheese. Pepperjack cheese would be a good spicy alternative.

Optional pizza toppings: dried parsley, grated/shredded parmesan cheese, dry red pepper flakes 

Directions:
1. Pull your pizza dough out of the fridge and let it warm up and rest. Grab two skillets - one oven safe one. While that is happening start the pizza topping in a large skillet.

2. To make the sloppy Joe pizza topping brown the ground turkey with the garlic, onion, and red pepper. 5 minutes. Break any large pieces think pizza topping.  

3.  Add in the red pizza/pasta sauce and brown sugar. Mine was frozen straight from the freezer but still worked just fine. It was defrosted quickly and the whole sauce was red, delicious, and thick. 7 minutes. 

4. While the sauce is thickening up, stir it occasionally, and preheat the broiler to 500 degrees. Add some oil if needed to your oven safe skillet. I used used my trusty old cast iron for this. 

5. Roll out your pizza dough to the size of the bottom of your skillet and proceed to cook the dough over medium, watching it carefully so it doesn't burn for about 5-7 minutes and then flipping it for another 2 minutes. I burned my the first one I tried. It reminded me of making flat bread. Should be lightly browned but cooked thru.

6. Top the crust with the meaty topping. It should cover it completely by at least an inch. Top the sloppy joe mixture with all that great shredded cheese. 


7. Broil the pizza for about 1 minute with the oven door cracked so you can keep an eye on it. You know its done when the cheese is melted and looks amazing. You can serve it immediately but I found it to be easier to cut and eat if you wait 5-8 minutes to let it cool a bit. 

8. Slice it with a pizza wheel and grab some forks to dig in. 
Enjoy pizza night in a new way and sloppy joes with a little less sugar and carbs than the original.  


From my kitchen to yours!
Stephanie

Saturday, December 14

Turkey Green Salsa Pan- Fried Burritos

I did a little freezer cooking this week when I made these easy little things...Turkey Black Bean Green Salsa Pan Fried Burritos. They were quick to make, and used up some leftover turkey I had tucked away in the freezer from thanksgiving. Feel free to use some leftover chicken or shred up some cooked chicken in lieu of turkey. 


Freezer cooking has been something that I have gotten good at over the last year and half since my hubby took a night shift job. Freezer cooking lets me have something ready for him that he can reheat no matter what time he wants to eat. It also means that when I am not feeling well he or someone else or I can simply finish a meal I had already started. Real life moment.... I have had a ton of medical procedures done in the last six months and at least 4 of them have ended me on some sort of bed-rest or limited duty for a day or more. To say that it has been hard would be grossly understated. All baby stuff granted... not life or death. But it does make me stop and be thankful for meals like this that taste good the night you make it AND up to a month or two later after reheating them. Besides I needed a good reason to eat salsa verde. I love that stuff! 


Please customize these burritos to fit your taste buds.
Cook + Prep time: 15-20 minutes if you have 4 yr old helping
Recipe barely adapted from Good Cheap Eats


Ingredients:
2 cups leftover cooked turkey 
3 cups of shredded cheddar cheese, divided
7 oz salsa verde medium (this was half of a jar for me)
12 burrito size tortillas
2 - 15oz cans of organic black beans, drained and rinsed
sour cream
favorite toppings such as extra cheese, diced green onions, diced jalpenos, lettuce, chopped tomatoes, ect...


Directions:

  1. Combine turkey, 2 1/2 cup of cheese, black beans and salsa verde in a very large bowl. 
  2. Mix well. Can be a bit messy but do get your kiddos involved. Mine had a great time helping! 
  3. Spread out the 12 tortillas and put approx 1/2 cup of the bean turkey mixture in the center of each one. 
  4. Fold the burritos. Tucking in the sides as you fold over the top and roll to make a log shape out of the filling. 
  5. Put any filled tortillas you aren't going to cook into a labeled quart or gallon sized freezer bag. 
  6. In the ones you are going to cook first, put 1 Tbs sour cream for creamy texture and richness before folding. 
  7. In a large pan heat 1/2 Tbs oil. Use tongs to pan fry the burritos for about 5 minutes or so on each side until they are golden and heated through. 
  8. Serve hot and top with the remaining cheese so it can melt. Top melted cheese with another dollop of sour cream, and/or any additional toppings. Tastes great with chips, rice, or corn on the cob for side dishes.

from my kitchen to yours


Monday, September 30

Garlic Flatbread with Turkey Curry & Cucumber Relish

Continuing with my personal contest of making 30 Rachael Ray recipes in 30 days.... here's two more - recipe number 8 & 9 of 30. 


I made this in the place of tacos for Monday night football last week. Perfect. Fun. Easy. Family friendly. I think I had used curry once before this - so it was a tiny itsy bitsy intimating. Isn't weird how something like a ground up spice can be intimidating. But this recipe couldn't be easier or healthier. I highly recommend the turkey curry and flatbread if you have a little extra time or make the flatbread a day ahead and just store it in a gallon size freezer bag. I promise the flatbread just tastes an hr of time so if you have an hr to make dinner on the weekend, do it. Tastes like 100% better than the store bought stuff. Make the store bought flatbread taste really bland. Plus if you aren't a fan of garlic use another seasoning its extremely versatile. I made the flat bread recipe twice since I found the flatbread recipe in an old Everyday with Rachael Ray magazine. The turkey curry recipe is from a June/July 2007 magazine issue. Love the fresh bread smell in the house too. 


Homemade Flatbread
Serves 4-8 
1 hr rising time + 12-15 minutes active cooking time

Ingredients:
1 Tb sugar
2 1/4 tsp active dry yeast (1 package)
1/4 cup lukewarm water
3 cups of flour
1 Tb salt
1/2 tsp baking powder
1 cup buttermilk, heated 10 seconds in the microwave or left on the counter for a few minutes
Unsalted butter
seasoning of choice: garlic powder, roasted garlic or another (crushed dried rosemary,oregano, cardamom, or thyme)

Directions:
1. In a small bowl combine 1 Tb sugar with the yeast and warm water. Let it stand for 5 minutes to activate the yeast. Should look foamy and cloudy water. 
2. Into a mixer bowl mix together (with a paddle attachment if using a stand mixer) the flour, baking powder, and salt on low speed. Add 2 Tb melted butter and the slightly warmed buttermilk, and the yeast mixture last.
3. Switch to a dough hook if using a stand mixer, and add either 2 Tbs roasted garlic or 1-2 tsp powdered garlic or seasoning of your choice. Knead for 5 minutes on low until dough is smooth. 
4. Grease a bowl with butter or sprayed with cooking spray. Put the dough in the bowl and cover it with plastic wrap for 1 hr to let it rise. 
5.  To cook them up: Separate the dough into 8 equal pieces. On a lightly floured surface roll the dough pieces out one at a time. Aim for 6 inches or bigger - pretty thin. Spray the pan with cooking spray unless using a cast iron skillet. Carefully lay the dough one at a time in the hot skillet and cook for 1 minute and flip and 1 1/2 minutes on the other side. As soon as the bread is done sprinkle with salt and/or spread on some butter. Butter is more if you are eating it with chicken or meat like a roll instead of like a shell with Turkey Curry (recipe below).

*Option: Make it like a dessert - If making it as a sweet dessert don't use any sort of savory seasoning. Sprinkle each piece of cooked bread with powdered sugar as it comes out of the pan. Super yummy with honey as well. 


Turkey Curry with Cucumber Relish
Serves 4
Prep time 10 minutes, cooking time 15 minutes

ingredients:
1 zucchini, finely diced
1 red pepper, finely diced
2 Tbs olive oil
1 Tbs flour
Beef broth
white wine
1 lb of ground turkey
1 onion, finely diced
1 large tomato
flat leaf parsley
lemon zest from half of a lemon
juice from half of a lemon juice
salt & pepper to taste
1 Tbs curry powder

Directions:
1. Heat the olive oil in a skillet to medium. Cook the onion, zucchini, and red pepper with the curry powder. Stir often. Cook for about 5 minutes until everything is tendercrisp. 

2. Add in the turkey and cook until its browned. Break up big pieces as necessary.  

3. Once turkey has those lovely browned bits (meat is caramelized) sprinkle the flour over everything. Let the flour cook out for 2 minutes. 

4. Lower the heat to low. Deglaze your pan with 1/4 cup - 1/2 cup of either beef broth or white wine or both. As the liquid hits the hot pan and creates steam use your spatula to get all those meats bits unstuck from the bottom of your pan.  

5. Cook over low heat and stir until meat mixture has thickened.  Serve with store bought OR the amazing homemade flatbread seen above.  

6. In a bowl combine the chopped parsley, lemon zest, tomato, and lemon juice. Serve it on the side for people to top their filled flatbreads with. Gives the dish a wonderful freshness. 

There two new recipes with endless ideas. I hope you try and eat and enjoy them. Change up taco night or sandwich night for something easy and fun with good fall veggies. Roasted squash or pumpkin, chopped into bite size pieces would be good additions with huge nutritional benefits. 

Eat well. 
From my kitchen to yours


Wednesday, April 17

Turkey Cran Monte Cristo Sandwiches

Hey all. Hope your week is coming along. Have you ever had breakfast for dinner? My husband used to make a sport of this... requesting pancakes and waffles for dinner on a regular basis. He works nights now so that's not really an issue anymore. But if you are craving a dinner/breakfast - try this!! This heated savory/sweet sandwich is AWESOME. The crunchy bread with the spices remind you of breakfast, and then you are hit with the creamy cheese and the semi tart/semi sweet cranberries.... a party of flavors. 


Just incase I am not being convincing enough... this sandwich is a great way to use up leftover thanksgiving turkey or in my case Easter turkey, and it is a lighter dinner choice too - which is perfect for spring. I saw this on pintrest and tracked it down to its original, a Paula Deen recipe. She makes awesome food. Click here to see her recipe. This is not an exception even with the changes I made to fit my family. If the promise of a amazing sandwich doesn't thrill you.... how about a 10 minute dinner from fridge to table meal? Not exaggerating... ten minutes tops.   

Makes 2 Sandwiches - Easily doubled or Halved

Ingredients

1 Tbs butter, unsalted, organic if you have it
4 pieces of bread (thicker works better) 
1 egg
1/4 cup milk (I used 2% - use whatever you have)
1 dash of nutmeg
1 dash of cinnamon
1 dash of salt
1 dash of black pepper
4 oz of creamy Havarti cheese thinly sliced or shredded
1/2 cup of fresh baby spinach (about 20 pieces)
4 Tb cranberry sauce ( 2 per sandwich)
6 oz of turkey from the deli or leftover from Turkey Dinner (ie... Thanksgiving or Easter)

Warning... This was the messiest thing I have made in the kitchen in a long time. I had scrambled egg everywhere LOL. I was like how on earth you do coat these very full sandwiches... I had cheese falling out, cranberries falling out, and turkey falling.... So I wish you the luck. It is worth the extra effort. I promise. 


Mix the milk, spices and egg together in a flat dish. 
Heat the butter in a large skillet.
While the butter is melting put some cranberry sauce on each side of the bread for the first sandwich.
Then put the cheese on both sides of the sandwich. 
Then put the meat on one side of the sandwich and the spinach on the other side. 
Carefully shut the sandwich and dip it into the egg mixture. 
Coat both sides with the egg mixture. 
Then put it in the pan and cook over medium for 3-4 minutes. 
Repeat with the second sandwich. Flip the sandwiches when they become golden and the cheese is melted. Don't be too concerned if stuff falls out... stuff it back in :) 

Serve with fresh fruit or veg! Perfect warm weather Brunch, Lunch or Dinner.

There easy. Messy. Simple. Fun. Tasty. Perfect for weekend brunch or dinner. I know my hubby has this weird thing about cranberries so I will definitely make this again just avoiding cranberries for him. Yes absolutely. It was so delicious. Too bad the sandwich thing kinda prevents eating seconds ;) See perfect for spring and getting back into shape. There are no seconds.... This could be a problem! Hahaha. 

Enjoy
From my kitchen to yours


Related Recipes:


Tuesday, April 16

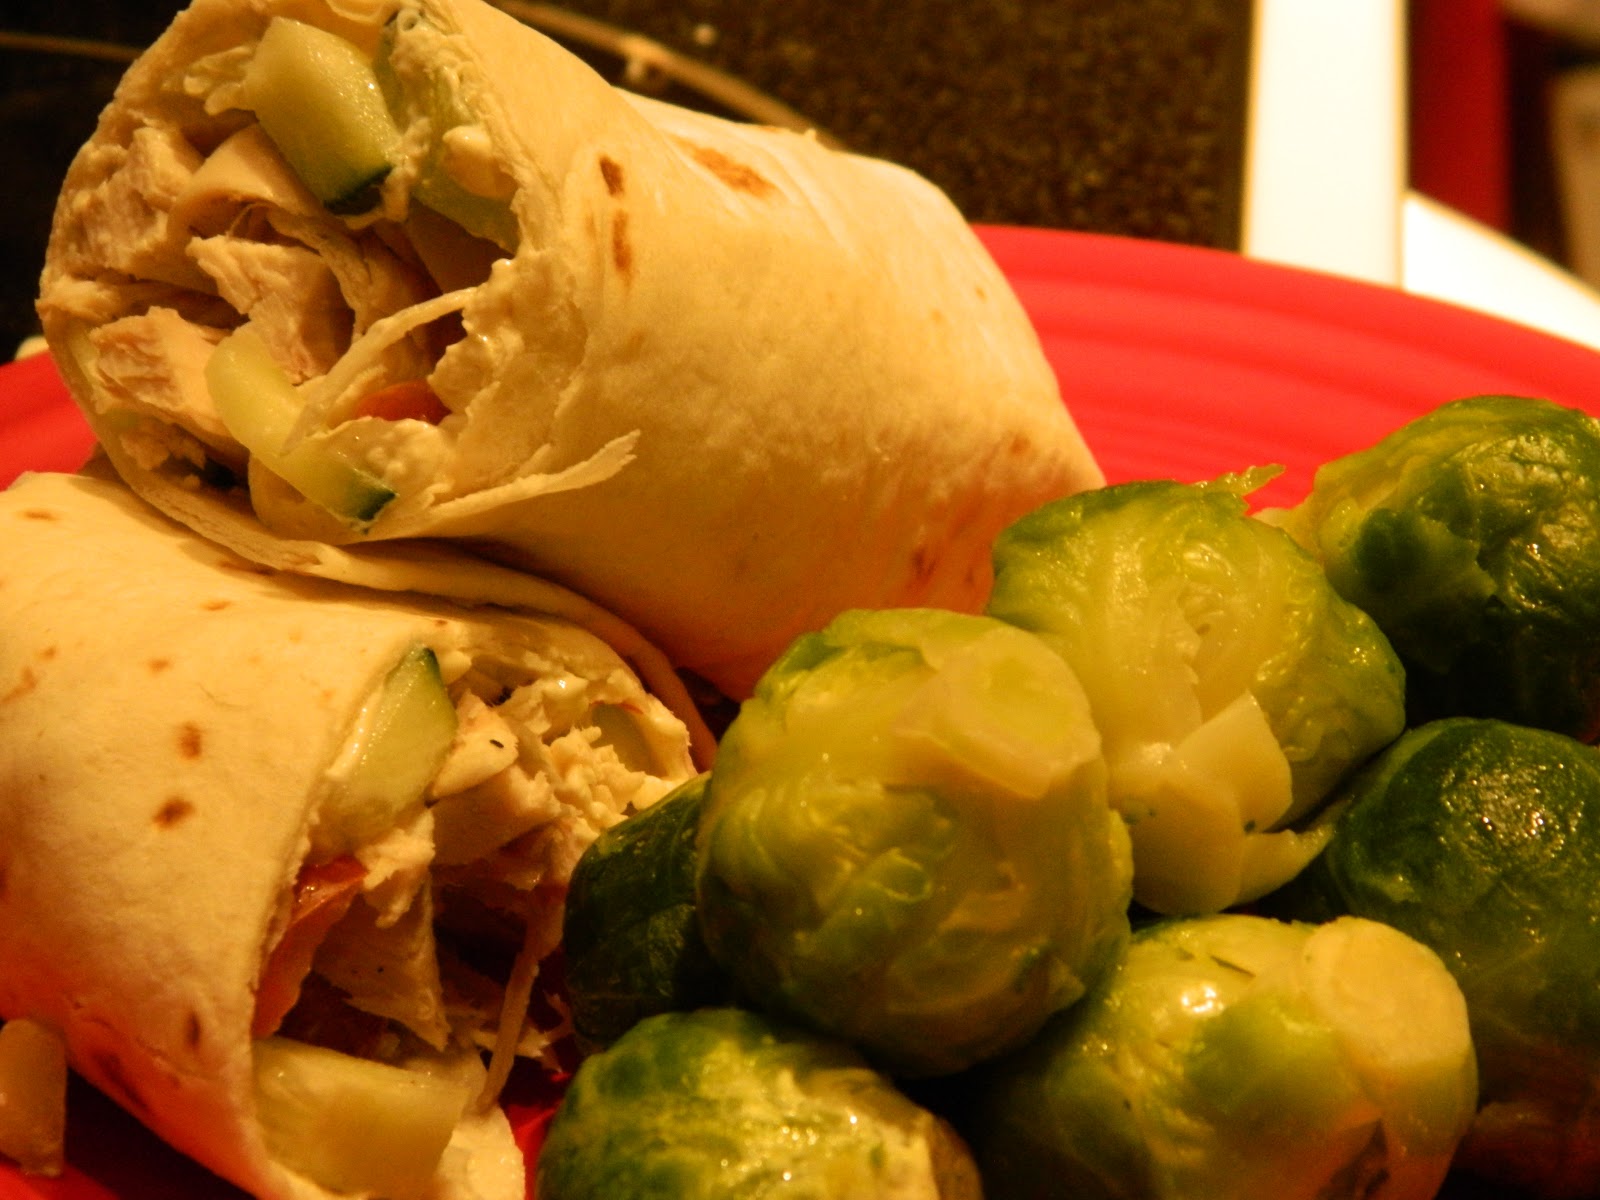
Cucumber Cream Turkey Wraps


Spring is officially here, well in Arizona, at least. We made it past the horrible events in Boston & Tax day - whew! Thankful for the prayers that are with the people on the east coast. I will keep saying some prayers for them too. What a horrible thing taking even the lives of children. What a week this is!

On a lighter note: If you need something creamy and delish to take your mind off of life and although it sounds like I should be putting some sort of chocolate chip cookie recipe in the next part, this totally hits the spot. Read on. This is as easy as it is healthy, sorry no chocolate this time. Next major horrible event I promise. Besides it is spring. The cactus is blooming, birds are singing, the hot sun is back, and my hubby just got a new black light to search for scorpions. He loves hunting for them, it makes him feel like hes protecting us, which he is. They are deadly to youngins like ours, if stung. So along with spring comes swimming suit season. Stop making all those yummy hot creamy fat laden soups, casseroles, and start eating lighter. I love winter/fall food - its so comforting. But spring food full of fresh flavors and new crisp veggies and tons of fruit. So embrace the change - at least that's what I am telling myself hahaha. So to help with those ahem upcoming shorts, tang tops, short sleeve t-shirts, and swimming suit purchases... here's a lighter entree to try.

This is more of an idea than a "real" recipe but I am throwing this out there because it was awesome and healthy. I found it on Entree To Life - a fun food blog with great recipes. I hope you try it and enjoy it as spring appears in your neck of the woods.

Think of it as your own specialty deli wrap for an easy portable lunch or easy dinner that doesn't involve heating up your kitchen. Sigh. Yes swimming suit season is coming.

Makes 1 wrap

Ingredients:
1/4 - 1/2 large cucumber, peeled, sliced thin (depending on how much you like cucumber)
1/8 tsp salt
1/16 tsp or 1 dash of pepper
3-5 cherry tomatoes diced in half (depending on how much or little you like tomatoes)
2 slices of leftover Easter or Thanksgiving turkey or deli meat turkey
1 triangle of laughing cow cheese. I used the garden veg flavor and it was perfect!
1 medium soft taco sized tortilla  (a flavored wrap would be fun here will have to try a spinach one next time)

Spread the cheese over the tortilla. Layer on the cucumber and the cheese. Season. Add on the tomatoes and turkey. Roll up and eat!


My three yr old and ours ate these yummy simple wraps with some cantaloupe and some steamed veggies. My son loved it because he said it looked like lunch. He kept saying how cool it was that we were having lunch two times in one day.


Have a great day!! 
From my kitchen to yours


Other related recipes:
Turkey Stew - Thanksgiving Style
Brunch: Turkey Veg Hash with Eggs 
Veggie Soup: What To Do With Leftover Cut Up Thanksgiving Veggies


Sunday, February 3

Tacos In A Sleeping Bag (freezer friendly)


The food is moving... ahhh and now its going camping. Ha ha no. Well sort of. These hand held meals are called Tacos in a sleeping bag. Similar to their cousins the pizza pocket and "walking tacos", these are SUPER easy and SUPER kid friendly.  Can you tell I am SUPER excited about these? The name, tacos in a sleeping bag, alone is amazing to my son. Its playful, and fun. He smiles so big every time I ask him if he wants some. The idea that this is a healthy freezer hot lunch from a make ahead meal is amazing to me. It takes only a minute to heat up in the microwave or a few more minutes in the oven. Love this! 

Okay so the idea of a stuffing meat + cheese into bread/dough isn't new at all.... its the flavor combo that IS new. Changing the pizza pocket into like a Mexican-Style pocket. It's just taking a good idea and making it better. Have you ever seen kids eat tacos... ugh. Messy. I usually roll my sons tacos up like burritos just to eliminate the mess. This is just like that. Almost mess free. Besides just trying this because the name is cool, the other cool "mom" thing is that you could stuff anything in this. I added tomatoes because we always put tomatoes on our tacos. But you could throw a bit of corn into these or cilantro or whatever. Depending on the veg you should think about sauting it because you want it soft and cooked before you bake it. Chop finely and think little amounts. One half of tomato was just fine for all 12 I did. And if you are eating at table serve it with all the rest of the taco fixin's.  It will taste almost exactly like a taco with some guac and sour cream and lettuce and or salsa. If you are on the go just have them eat it as is. 

Makes 12 
Kid serving size 1 or 2 
Adult serving size 3 or 4 
Recipe adapted from: http://onceamonthmom.com/tacos-in-a-sleeping-bag-kid-friendly

Ingredients for Tacos in a Sleeping Bag: 
1/2 lb lean ground turkey or beef ( I used ground turkey breast)
1/2 can approx 3 or 4 oz of mild chopped green chillies
1/4 tsp pepper
1/2 tsp salt
2 Tbs taco seasoning or 1 packet
1/4 yellow onion (will be grated in over the skillet)
1/2 medium tomato, seeds removed and extremely finely chopped
pizza dough, homemade or store bought
approx 1/2 -3/4  cup of cheese, cheddar or whatever you like

Ingredients for Pizza dough
1 1/2 cup all purpose flour
1 Tbs white sugar
1 tsp salt
1 Tbs yeast
1 cup hot water (not boiling)
1 cup oat flour
2 Tbs Olive oil
flour for sprinkling on counter while rolling the balls out
course corn meal for sprinkling on pan while baking 


Directions: 


Mix all the ingredients together to form pizza dough. If it feels sticky and is difficult to roll into one big ball add a small handful of flour and work it in... 1/8cup- 1/4 cup of flour at a time. It should be easy to work with. Let the dough rest for 10 minutes and then you can use it.

While the dough is resting cook the filling for the sleeping bags. In a skillet cook the meat over medium heat with the salt, pepper, taco seasoning, and chillies until half way done. At this point grate in the onion to help give the lean meat some moisture and extra flavor.


Once the meat is fully cooked turn off the heat, and in the tomato.

When the resting time is up for the dough, sprinkle some flour on a your counter top or cutting board. Separate it into equal sections. Approx a little bit bigger than the palm of your hand. I got twelve 13/4 oz balls.

Roll each ball into a flat oval or circle 


Put 1 Tbs of the meat mixture in the middle. Repeat 11 more times. Then top with a sprinkle of cheese approx 1/2 Tbs - 1 Tbs.

Sprinkle some course cornmeal on a flat cookie sheet or baking sheet to prevent sticking.


Seal the edges and bake at 375 for ten minutes. Flip over carefully some of the dough will be tender still. Bake for another 5 minutes for even browning without using an egg wash.

Let them sit the counter to cool off, approx 15 minutes, flash freeze them until frozen on a cookie sheet. Transfer them to a labeled freezer bag for easy lunches and dinners.


There lunch or dinner is done in less than 30 minutes and you have some extras in the freezer for next time! My son is a great eater and ate 2 at lunch today and was full. So that means in 30 minutes I made 6 lunches for him. Yay! 
No running threw a drive thru or grabbing last minute reservations - head home because I know there is something already waiting and healthy. 

Enjoy the rest of your weekend
From my kitchen to yours 

Saturday, December 1

Turkey Stew - Thanksgiving Style

a picture my son colored for me
Even though it is December 1st today and no longer November, my month of yummy soup recipes, here is another yummy soup/stew recipe. Its great for using up some leftover turkey or even leftover shredded cooked chicken. I have bought a turkey breast (they do sell them year around) just to make this recipe. Its that good. Trust me. 

If you haven't ever had a rutabaga this recipe is a great first try! Its richer than a potato, but white like a potato (if you have picky kiddos - shhh they won't be able to tell the difference), are a great source of fiber, good source of minerals and surprise vitamin C! So if you need some soup because you (among many are sick) be sure not to skip the funny purple white vegetable. 


Ingredients: (think fall veggies)
  • 1 brown russet potato - scrub skin well - roughly chopped
  • 1 large carrot - scrub skin - roughly chopped
  • 1 rutabaga - peeled with a pairing knife - roughly chopped
  • 3 ribs of celery - roughly chopped
  • 1/2 onion - finely chopped 
  • 1 yam or sweet potato - peeled and rough chop
  • water/flour mixture for thickening: in a separate cup or bowl combine 2 Tbs all purpose flour and 1/4 cup water 
  • 4 cups of chicken or turkey stock homemade or store bought
  • 1 cup of turkey or chicken per person ( I used 3 cups/ 9 oz)
  • 1/2 tsp salt
  • 1 tsp old bay seasoning
  • 1/2 tsp garlic powder
  • 1 bay leaf
  • 1/2 tsp dried ground sage

Cooking Hint: See the picture to the right? It is a freezer bag where I put the ends and tops of the veggies I cut up for soup. When I am done with all the chopping I just put the air out of the bag and it goes into the freezer. Not only does this save time when I need veggies to make homemade stock/broth but it saves money. 
Don't throw out veggies that you can use later.  

Directions for the Thanksgiving Style - Turkey Stew
1. Saute the veggies in 2 tsp olive oil for 4-5 minutes in a large pot

2. Add the spices, chicken or turkey broth, and 1/2 cup of water

3. Bring to a boil then drop the heat to medium heat for 15-20 minutes

4. Add another 1/2 cup of water and the shredded turkey

5. Continue heating through approx 5 minutes on medium low - stir occasionally

6. To the pot add the water/flour mixture and stir occasionally until it starts to thicken and heats through. I let this go longer (like 10 minutes) on low since I was waiting for these yummy biscuits (Parm Basil Biscuits) to come out of the oven. But as soon as it thickens taste for seasonings and its ready. My turkey broth was well seasoned so I didn't need to add salt or pepper. 

Serve hot with some biscuits, crackers, or crusty bread 

Enjoy! 
From my Az kitchen to yours


Sunday, November 25

Homemade Turkey/Chicken Broth


As we are all enjoying turkey leftovers, and other fall flavors, I am regressing back into my cold weather November soup mode. Soup, that food that is so comforting, warm, inviting, throat soothing, that it fills your kitchen full with good smells.  

This broth is useful in many ways. First, it can be the base for any broth based soups, second this liquid can be added to rice to give it more flavor than plain ol' water, third it replaces chicken broth in recipes to save you money, and last it uses the turkey bones from the turkey that may or may not still be in your fridge. You bought the turkey you should use all of it. 

This is a super easy recipe and it freezes well. This also may be used to make chicken broth/stock by subsituting chicken bones for turkey ones. 

Ingredients:

1 onion quartered
1 handful of fresh parsley (keep this whole)
1 huge handful of fresh rosemary (keep this whole)
2 large carrots chopped into large pieces 
3 stalks of celery chopped into large pieces including leaves
1/8 cup pepper
1/8 cup salt (yeah not joking about this - trust me)
Your entire turkey carcass (all the turkey bones)


Put all the ingredients in the largest pot you have. Then fill almost to the top (about an inch to spare) with cold water.  Stir with a large spoon... bring to a boil and then lower the heat to low. Put a lid on it and simmer for 3 hours.


Let it cool on the stove (took about 1/2 hr). Drain the liquid broth off and put the broth in the fridge. The fat will separate over night.  


(optional) Go through the chunks of non liquid stuff. Yes it looks gross I know. Keep going. There usually a good handful of dark meat to be found. Pick out any meat you can find, keep the meat, throw away the bones.  Keep the softened cooked veggies for a flavorful, vegetable pureed soup. Click here  for a great veggie soup recipe.

The next morning just skim the surface with a spoon to get the fat off. 

Divide into portions for easy use in the next couple days. Freeze any amount you aren't going to use over the next week

Slow simmer creating tons of flavor


Keep enjoying those fall flavors!

From my Az kitchen to yours


Saturday, November 24

Brunch: Turkey Veg Hash with Eggs

turkey vegetable hash topped with a sunny side egg for me
A breakfast or brunch hash is a great way to use leftover turkey. My three year old gobbled this down without us having to ask him twice to finish his breakfast. My hubby had seconds. Victory. Does it feel like "leftover turkey"? Nope. It really is transformed into a new meal. Easy brunch on a Saturday - check. Try it. You won't be disappointed. Any root vegetable would be good in this - possible modifications could be sweet potatoes, carrots, leeks, butternut squash, rutabagas, or parsnips. It's a great way to sneak or introduce a new veggie into your kid's diet. 

Serves 4. 
Recipe adapted from a Country Living magazine November 2011. 

Ingredients: 
1/2 lb red potatoes, quartered (2 medium sized)
1/2 yellow onion, finely diced
1 yellow bell pepper, finely diced
1 1/2 Tbs olive oil
2 tsp salt (divided)
1 1/2 cups or 1/2 lb leftover cooked, shredded or chopped turkey white or dark meat
1/2 tsp pepper (divided)
1 heaping tsp Italian seasoning blend
4 eggs
1/3 cup water
2 tsp minced garlic
1/4 cup or one handful of chopped fresh parsley


Directions:

1. In a medium pot bring the quartered red potatoes to a boil with 1 tsp salt

2. Boil for 3 minutes

3. While boiling potatoes, heat the olive oil in a skillet and saute the onion and garlic together until they are soft - approx 5 minutes

4. Drain the potatoes and dice them into bite size pieces - set aside


5. Add the yellow pepper, Italian seasoning, 1/4 tsp pepper into the skillet and saute on medium low or low for another 3 minutes

6. Increase the heat to medium high and add the potatoes and turkey to the skillet. Cook for 5 minutes - stirring only a few times. You want the some of the sides of the potatoes to get those crusty edges.

7. Cover, reduce heat to low - add in 1/3 cup water. Cook for 10 minutes more. Check the potatoes with a fork. When they are done - fork tender. Remove from the skillet from the heat. 

8. Fry the eggs in another skillet with the rest of the salt and pepper sprinkled on the tops of each one. Approx 3- 4 minutes. Use cooking spray or oil however you normally cook your eggs. I have a really good non stick skillet so i normally don't use anything.  Do take care not to break the yolks, and be careful to not over cook. The yolk breaking open over the potatoes is fun for kids and tastes delicious! 


turkey veggie hash topped with over easy eggs for the hubby

9. Garnish the skillet with potatoes with chopped fresh parsley - one good handful - approx 1/4 cup

10. Serve the food with the eggs topping the turkey hash. 


Have fun using up some of your leftovers in a new way.
From my kitchen to yours